Lesson Six: Show the Temperature Outside
Now we will code something really cool (or hot) - reaching out to the Internet and finding out what the temperature is outside!
Your Raspberry Pi should be able to connect to the Internet for this lesson to work correctly. If it does, when we press a button the clock should reach out to the US National Oceanic and Atmospheric Administration and use the weather station closest to you to find the current temperature outside. Once your clock finds out what the temperature is, it will show it on your display for a few seconds.
In the previous lesson we tested our button out but we didn't want to fetch the weather yet - we made our test as simple as possible before we added something new. Now we can open up the "Weather" drawer in our toolbox:
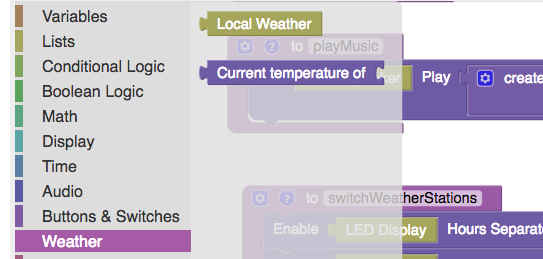
We have only two blocks in this drawer, and we will use both of them to add a new action into our "switchWeatherStations" function:
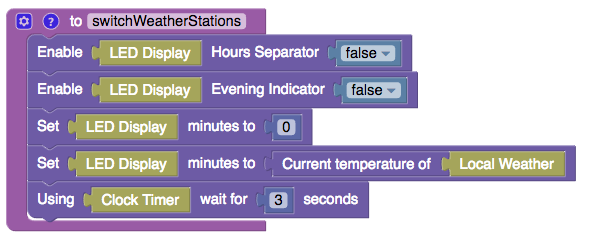
Save our work and now test this out. You should see the current weather on your clock! If things do not work, test to make sure:
- Your button is plugged into your Raspberry Pi correctly
- Your Raspberry Pi can connect to the Internet
- Your local weather station is correctly configured
Congratulations - you're the proud builder of a fully operational Hack Clock! You aren't finished yet - you can now customize the Hack Clock in whatever way you like. If you would like to see some other examples (like having a button control the music), click on the "Restore" button and load one of the examples. Don't worry too much about messing up; you can restore your previously saved code if things go completely wrong!