Lesson Five: Adding Buttons to Push
Up to now the only way for us to interact with our clock has been through its web page and IDE. What if we aren't near our computers? Let's add a button on our Hack Clock so it can respond to us pressing it.
Before we keep going you need a button wired up to your Raspberry Pi, as detailed in the Creating Buttons and Switches section of the hardware instructions. We will be programming your clock to respond to pressing your clock's button down.
Eventually we will want this button to display the temperature outside, but before we do that let's write a simple test that will cause your display to show only zeros for a while. First up: we will write a function that zero's out your display. Let's name it "switchWeatherStations" since it will eventually show the weather.
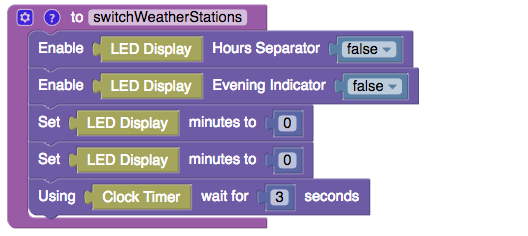
Note that this function is turning off all of our display indicators and only showing "0" for the minute and hour. The very end of this function has an interesting block from the "Time" drawer - the "Wait for _ seconds" action. This will make your code wait for a few seconds, and then continue updating the time as it always has.
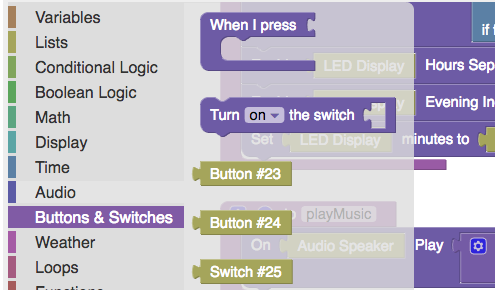
Now let's call this function once we press our button. If you open up the "Buttons & Switches" drawer in our toolbox, you will see several constants for whatever buttons and switches were set up when the Hack Clock software was installed. Each button and switch has its own unique number. This unique number is the input/output number that the Raspberry Pi knows. While this may be the first button on your clock, it may be the 24th input/output number on the Raspberry Pi. If this seems weird... it kinda is. If you have problems finding out what number your button is, ask whomever installed the button if possible. Otherwise you can just guess and try again - you aren't going to hurt anything by experimenting in your code!
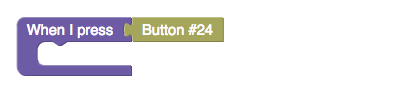
Another interesting block is the "When I press _" action. Let's drag that over to our workspace, and click "Button #24" onto the top:
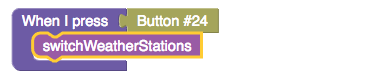
Now we need to inject our new "switchWeatherStations" function into the "When I press" action:
Let's save our work now. Once your new code is finished saving, when you press the button it should zero-out the display. If your button does not work, there is an even simpler test you can load to see if the problem is with the code or with the wires connecting the button. Go to the "Restore" page and load the "Using switches and buttons" example. That should dim and then brighten your display when a button is pressed. If that code doesn't work correctly, check with the person who put your Raspberry Pi together and have them check the button connected to the clock.
Nicely done! Now that the button works, let's get it to show the current temperature outside!