Lesson One: Change the Time
We've wired up the display and so far all we see is... "0:0." Exciting.
What we want to see is the current time. Open up the Hack Clock IDE again, and take a look at the code we loaded for Lesson One.
We have a lot of oddly-shaped rectangles and puzzle pieces connected here. Let's make sense of it all. First off, the toolbox:
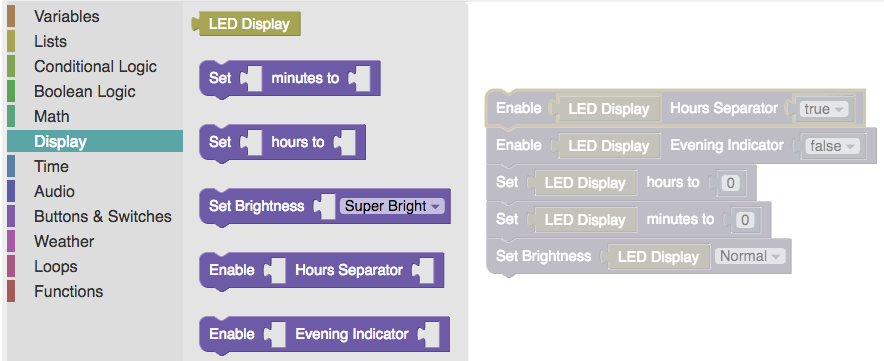
The toolbox is on the left edge of our integrated development environment, or IDE. From here we can open a drawer in our toolchest, pick a block to use, and then drag it over to the workspace. Click on the "Display" label on the toolbox - you will see a set of blocks appear just to the right of that list. Try to drag a block from the toolbox onto the plain white workspace - you should be able to drag-and-drop it anywhere there is free space. The block should click into place. After that, drag the block into the trash icon in the bottom-right. The block should dissapear.
Each block represents either an "action," a "value," or a "variable." Let's look at "actions" first.
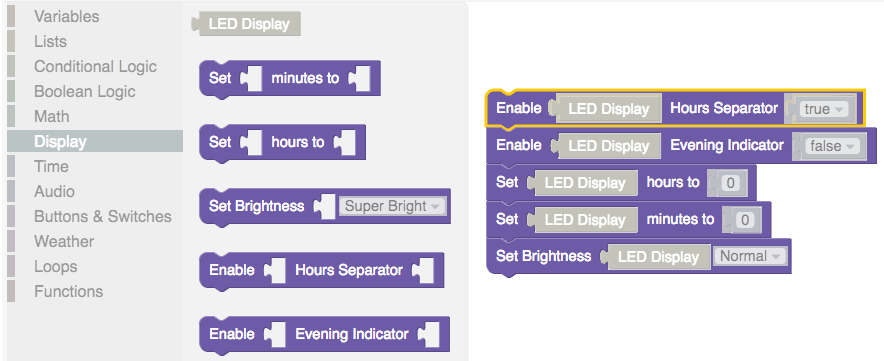
Actions usually connect to a value or a variable, but they don't necessarily need to. Each action does something useful - such as make a number light on the display or play some music. Actions can also be connected to other actions from the top or bottom, so that actions can execute in a sequence. If an action is snapped on top of another action, the top action will execute and then the bottom action will execute next.
Let's look at values next:
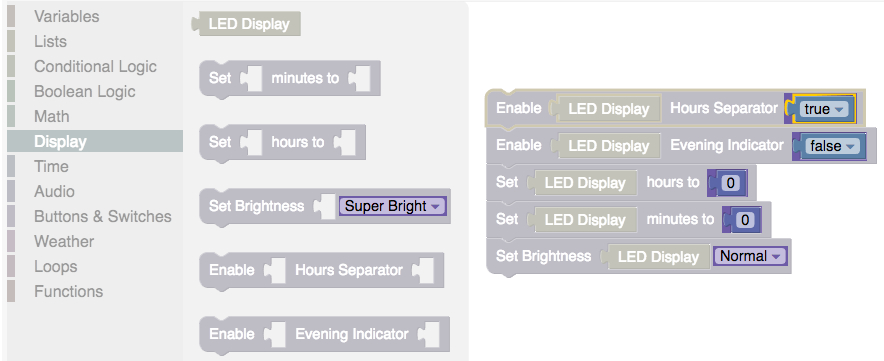
Values are like set-in-stone facts about our world. The number "0" is always zero, the letter "B" is always a capital b. I can't force a "0" to be equal to one - it is always the same. Here you can see values highlighted like numbers or brightness.
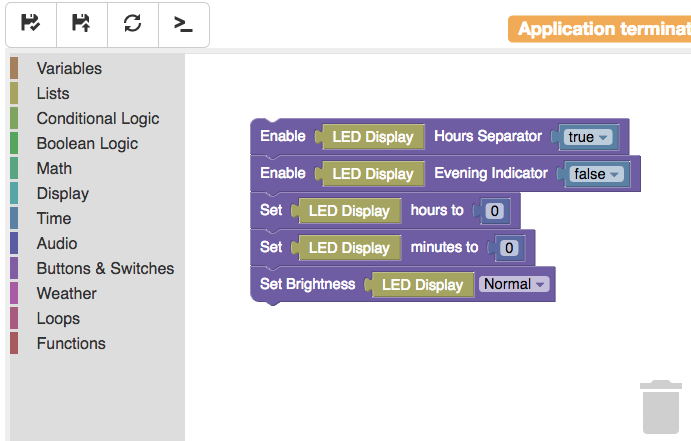
If you look at the Lesson 1 code, reading from top to bottom, we can see that a stack of actions are telling the display to turn on the colon lights, turn off the evening indicator, set the hours digits to "0," set the minutes digits to "0" and set the brightness level to "normal."
What does the little block named "LED Display" do? Right now let's think of it like a value, since we can't change the meaning of it. This will always operate the light-up display.
Now let's change the minutes and hours digits that are showing on the display.
Change the hours to "12" and set the minutes to "33", then click on the save button in
the top-right corner:  .
.
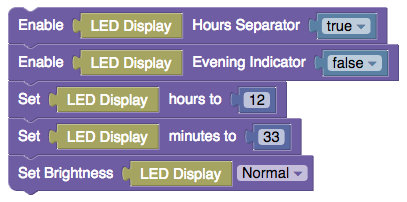
Once you save your changes, the clock should re-start itself. The display will blink, and you should see it now display "12:33." Congratulations! You can now make the display show whatever you wish!
Next up - try adjusting the brightness. Set it to the highest value of "brightest", and the lowest value of "off." Set it for a few values in between. What level of brightness do you like most?
Next up - Show the Time Like a Real Clock